Friday, March 22, 2019

Lard America Gaming Club at Cold Wars 2019

The Lard America Banner stands proudly at Cold Wars

The Historical Miniature Gaming Society's (HMGS), "Cold Wars" gaming convention was held March 15-17 at the Wyndham Lancaster Resort (nee Lancaster Host), in Lancaster Pennsylvania.  While many structural changes and renovations made the facility a much nicer destination, one constant was a great selection of games sponsored by the Lard America Gaming Club.  Lard America is a loose confederation of historical gamers with a fondness for miniatures games by TooFatLardies (TFL).  The group came together starting in 2017 to bring the goodness of Lard to HMGS conventions and beyond.

After a detour for Fall In that put us in Windows Vistas (or whatever the old restaurant area was called), we returned to the main gaming area in a refurbished Distlefink Ballroom for Cold Wars.  Under much better lighting, Lard America put on 12 games over two days covering a wide range of historical periods utilizing several different TFL rule sets including, What A Tanker!, Sharp Practice, Chain of Command, I Ain't Been Shot Mum and Dux Britanniarum.  Judging from advance registration and attendance at the games themselves, these proved to be very popular events.  And, for the 3rd straight convention a Lard America game master received a PELA (Pour Encourager Les Autres) Award - congratulations to Ed L.

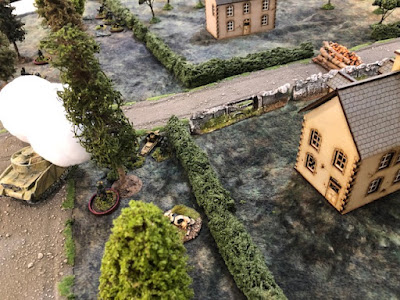
Just to give a taste of what was available at Cold Wars, below are photos from the convention highlighting some of the games the club sponsored:

Game:  Heart of Stonne
Period:  World War II
Rules:  Chain of Command
GM:  John Emmett


Game:  Mourir Pour Cao Bang
Period:  Modern French Indochina
Rules:  Chain of Command
GM:  Patrick Berkebile


Game:  Clodwig Wodenborn Finds God
Period:  Dark Ages
Rules:  Dux Britanniarum
GM:  Gunnar Lopez


Game:  A Cow! A Cow! My Kingdom for a Cow!
Period:  AWI
Rules:  Sharp Practice
GM:  Ed Bowen


Game:  Hauts-Vents
Period:  WW II
Rules:  I Ain't Been Shot Mum!
GM:  Thomas Ballou


Game:  Dust up in the Desert
Period:  WW II
Rules:  Chain of Command
GM:  Eric Boyle


Game:  Rats vs Rams
Period:  WW II
Rules:  What A Tanker!
GM:  Chris Thomas


Game:  The Defense of Khatisino
Period:  WW II
Rules:  Big Chain of Command
GM:  Ed Leland


Game:  Probe at Bas Mouen
Period:  WW II
Rules:  Chain of Command
GM:  Andrew Frantz


These photos are just a sample of the Lard America games at Cold Wars.  Lard America will be at Historicon this July with a great slate of TFL games across multiple historical periods.  Hope to see you there!

Saturday, November 17, 2018

Fall-In 2018: An AAR of Race Across Carolina - The Final Fury

Lard America gamers were out in force at this year's HMGS Fall In Wargaming Convention, held in Lancaster PA., 9-11 November.  Located in the Vista Windows room at the venerable(?) Lancaster Host, 15 TOOFATLardies games were on the schedule.  Among the offerings of TFL goodness was Chain of Command, I Ain't Been Shot Mum, Sharp Practice and What A Tanker!


Race Across Carolina - The Final Fury

The fourth and final scenario for my AWI mini-campaign, "Race Across Carolina," was played on Saturday morning starting at 0900.

Table Sign for RAC

In the third installment, played at Historicon this past summer, the British had pushed the Americans out of the small town of Freemantle, N.C. and, to add insult to injury, a group of Hessian Jaegers commandeered an abandoned beer wagon and ensured it was safely spirited away to the main British camp.

However, in this scenario the British still had to deal with elements of the Maryland Continental Line, the remnants of the 3rd Continental Light Dragoons, and other supporting elements of the colonial forces.

Morning Breaks over a peaceful North Carolina farm
Out for a morning stroll, but danger approaches.....
The British force, consisting of elements of the 42nd Regiment of Foot, the 23rd Regiment of Foot, the British Legion dragoons and the now sober Hessian Jaegers, broke camp early that morning - the peace was about to be shattered.  The horseman of the British Legion immediately began a search for extra mounts as they needed additional horseflesh after the last encounter with the Continental Light Dragoons.

Where could those extra horses be?
Pictured below are some of the early positions of the two forces.  The 23rd Regiment of Foot, led by COL Timothy Urquart, is in line heading up the road, about to clash with the Maryland Continental Line, ably commanded by COL William Bond.  LTC Hugh McFerrin leads the 42nd foot in column around the mansion house (which they will eventually occupy).  The Virginia State Line is just crossing the bridge over Little Hog Wallow Creek.   The dashing LTC Barry St. Leger and the British Legion is crossing a cow pasture and not in the photo.

The Black Watch Approaches


Wait, we found the Legion!

Deployment from the American Perspective
MD Continental Line crosses Little Hog Wallow Creek

For the first time in this mini-campaign the American riflemen and Hessian Jaegers did not factor significantly into  the outcome of the game.  They deployed into the forests, but never really engaged.  The heavy fighting fell to the infantry and dragoons of both sides.

Not much happening here...

The Marylanders and the 23rd Foot engaged in a firefight with the British taking casualties as the shock began to climb.  Both sides held their ground.  Meanwhile the Virginia State Line crossed the bridge and moved to the right rear of the Continentals - they would soon play an important role.  While the British and Americans continued to slug it out, the British Legion scurried around the action and galloped into the stable, where fresh mounts were waiting.


A horse, a horse!  My kingdom for a horse!  Whoops, wrong war.

 The Legion deployed in line and prepared to charge the Continentals.  In his haste, LTC St. Leger failed to see the Virginia State Line which had come up to support the Continentals.  Nevertheless, the Legion charged the Marylanders in the flank and sent them running toward Little Hog Wallow Creek, the bridge, and possibly, safety.

Later that same day, as evening shadows fall, a charge seems appropriate
Before St. Leger could utter "Bollocks!",  Capt. Edward Rhodes hurled the Virginia State Line into the milling Legion horsemen.  Mayhem ensued, but the vaunted British Legion turned tail and ran.  On the other side of the battlefield, the 3rd Continental Light Dragoons, employing local farmer Zebulon Freemantle as their guide, followed an old Indian trail through the woods and charged pell mell into the 23rd Foot, who having driven the Continentals from the field, were nursing their wounds and beginning to fall back.  This charge finally broke the morale of the British Force and the Colonials stood triumphant in the Race Across Carolina!


A solitary Colonial Officer crosses the bridge.


Race Across Carolina was brought to you by Lard America


Tuesday, July 17, 2018

Historicon 2018 - AWI Race Across Carolina Recap


This is a brief AAR of my AWI game, Race Across Carolina - The Fight for Freemantle, that my son and I ran at the recent Historicon convention in Lancaster PA.  I want to mention that my game was just one of 20 miniature wargames put on by Lard America, a group of gamers with a particular affinity for games developed by the TooFatLardies (TFL).  We have run games at Fall-In (2017), Cold Wars (2018), Historicon and plan to be back at Fall-In this November.  Race Across Carolina utilizes the excellent TFL rule set Sharp Practice.

Table Sign
Anyway, on to the game.  This was the 3rd in a fictional mini-campaign I am running that takes place in the south during the American War of Independence (AWI).  In this game, the Americans are holding the the small town of Freemantle in North Carolina while advance elements of the British army are approaching in search of a rumored supply dump and an abandoned beer wagon.
The players were provided with a colonial 'newspaper', the Carolina Gazette that summed up the situation:

Now, on with the game.

Basic Table Layout - set-up in progress
The above photo shows the town of Freemantle.  The Americans deployed at two locations - the camp (middle left) and the bottom of the road (not shown), while the British deployed on the road (top) and had to either cross at the bridge, a ford in the river, or take their chances crossing the river.

Here are the rosters for the combatants:


The American riflemen and the VA State Line deployed at the camp while the Dragoons & the MD Continentals came on board at the bottom of the road.

The British were led by the Jaegers and the 23rd Foot, who forded the river, followed by elements of the Black Watch (42nd) and the fearsome British Legion.


The 42nd Foot getting ready to cross the bridge

The colonial riflemen and Hessian Jaegers quickly engaged in the woods behind the brick townhouse with the riflemen getting the worst of it, being forced to withdraw.  The Jaegers commander, Capt Friedrich von Jungkenn was wounded in the exchange.  BUT, the Jaegers controlled the woods and the abandoned beer wagon as seen below.
The beer wagon is captured as a fox sits idly by.
The 23rd and Va. State Line are coming up quickly
23rd Foot turns to meet the Virginians

The 23rd Foot quickly rallied to support the Jaegers and counter the advance of the Virginia State Line troops; meanwhile the Maryland Continentals were progressing up the road toward town.  They were unfortunately slowed by a Sharp Practice random event - "Damned Dog!"  The leader, COL. Bond trod in something unpleasant!

Maryland Continental Line
As time for the game was quickly expiring, MAJ Robert Stack and the 3rd Continental Light Dragoons charged into the British Legion, ably commanded by LTC Barry (Bloody Barry) St. Reynolds, and were quickly routed by the green-jacketed horsemen.  The MD Continentals did not make it to the action and on the British side, the 42nd Foot, after being held up by the water cart at the bridge crossing, were just entering as support for the 23rd when the game ended.  At the end, the Americans maintained a tenuous hold on the town, but the tavern (seen in the photo above), had no beer to serve the thirsty soldiers.

So I awarded a tactical victory to the Americans, but a moral victory to the British.

Below are couple random shots of the rest of the game board.

Overhead shot of the 23rd Foot

The Orchard

Barn, chickens and geese

We'll return at Fall-In this November.

Wednesday, May 30, 2018

Some Odds and Ends for Sharp Practice AWI Gaming

I figured it was about time for another infrequent post to my blog.  Recently I have been working on what could be called odds and ends.  One of the things I really like about the Sharp Practice wargaming rules is the opportunity to tell stories within the overall scenario.  I like to include civilians (farmers, towns people, etc), animals (farm animals and wild creatures) and miniatures that used together create vignettes.  These could be objectives for the game or could just be there to enhance the scenery.

An Abandoned Beer Wagon
Although the title of the blog indicates that it includes the American Civil War and World War II, I am focusing entirely on the American War of Independence for the time being.  Here is a collection of photos of some of the figures/scenes I have completed:


Cemetary


Soldiers Camp Scene

Blacksmith Scene


Assorted Animals - foxes/geese/hound dog
And of course I'm still paining soldiers:  

Maryland Continental Line (flag by Flag Dude)


In preparation for a game at Historicon, some additional Continentals and the 23rd Regiment of Foot are in the painting stage.  Also my son and I have been working on the Charlie Foxtrot Tidewater Home and hope to have this as the centerpiece of our Historicon game.  Photos to come...

AWI at "A Bridge Too Lard"

On Saturday September 21, John Emmett of Lard America hosted a game day at Huzzah Hobbies in Ashburn Virginia.  Entitled "A Bridge Too ...